
Introduction
In today’s academic and professional environments, effective project management is a vital skill. Whether you are managing a research project, software development, event planning, or IT deployment, using a structured tool like Microsoft Project can greatly enhance your planning, execution, and monitoring capabilities.
This tutorial provides a comprehensive walkthrough of Microsoft Project from a beginner’s perspective. You’ll learn how to:
- Create a new project
- Structure tasks and subtasks
- Set durations and dependencies
- Create Gantt charts
- Identify the critical path
- Use milestones and constraints
- Monitor project progress
What is Microsoft Project?
Microsoft Project is a project management software application developed by Microsoft. It allows users to:
- Plan and schedule projects
- Assign tasks and resources
- Track progress
- Manage budgets
- Visualize task dependencies
It is commonly used in industries such as engineering, construction, IT, business, and education.
Step 1: Create a New Project
- Launch Microsoft Project
- Select Blank Project
- In the ribbon, click Project Information and:
- Set the Start Date
- Choose the correct Calendar Type
Screenshot Tip:
 Show the Project Information popup with start date selected.
Step 2: Add Tasks and Durations
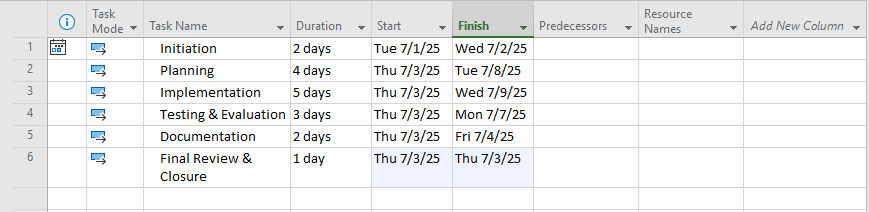
In the Gantt Chart view (default), begin adding your tasks in the “Task Name” column.
For example:
| Task Name | Duration |
|---|---|
| Initiation | 2 days |
| Planning | 4 days |
| Implementation | 5 days |
| Testing & Evaluation | 3 days |
| Documentation | 2 days |
| Final Review & Closure | 1 day |
- Avoid assigning durations in hours unless the project requires hour-level detail.
- Use automatic scheduling for better timeline control.
Screenshot Tip:
initial task list:
Step 3: Create Task Dependencies
Dependencies help MS Project calculate task timing and detect schedule delays. Most common is Finish-to-Start (FS).
How to Add Dependencies:
- In the “Predecessors” column, link task numbers:
- Task 2 depends on Task 1 → Enter
1 - Task 3 depends on Task 2 → Enter
2
- Task 2 depends on Task 1 → Enter
- Or select a task → Click Task → Link Tasks (Ctrl + F2)
You can customize the relationship (FS, SS, FF, SF) and add lag/leads in Task Information → Predecessors tab.
Screenshot Tip:
Show dependency lines in Gantt view:
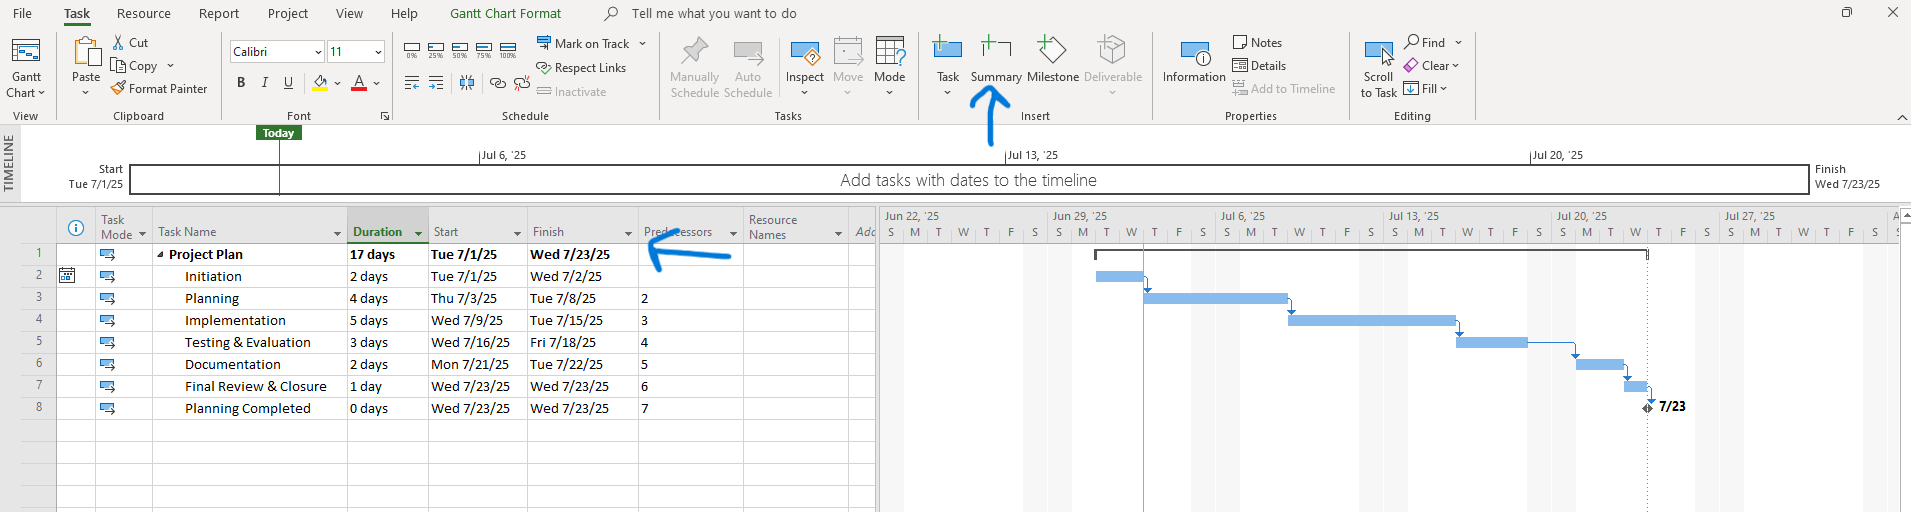
Step 4: Add Summary Tasks
As your project grows in size and complexity, it becomes essential to structure your tasks into meaningful project phases. Summary tasks serve as parent containers for related subtasks, allowing you to logically organize your project by stages like Planning, Execution, or Testing. A summary task:
- Represents a phase or group of subtasks
- Automatically reflects the total duration and progress of its subtasks
- Collapses/expands for easier Gantt chart navigation
How to Create a Summary Task
- Insert a new task row where you want the summary to appear.
- Type a summary task name (e.g., “Phase 1: Planning”).
- Select all relevant subtasks below the summary row.
- Click the Indent button in the Task tab, or press Alt + Shift + →.
MS Project will:
- Bold the summary task
- Automatically calculate start/end based on subtasks
- Show roll-up % complete and bar in the Gantt chart
Screenshot Tip:
Display summary task in Gantt view:
Step 5: Insert Milestones
Milestones are zero-duration checkpoints to mark key project events like:
- “Planning Completed”
- “Prototype Approved”
- “Project Handover”
How to:
- Add a new task → Set Duration = 0 days
- Check “Mark task as milestone” under Task Information
They will appear as black diamonds in your Gantt chart.
Screenshot Tip:
Display milestones in Gantt view: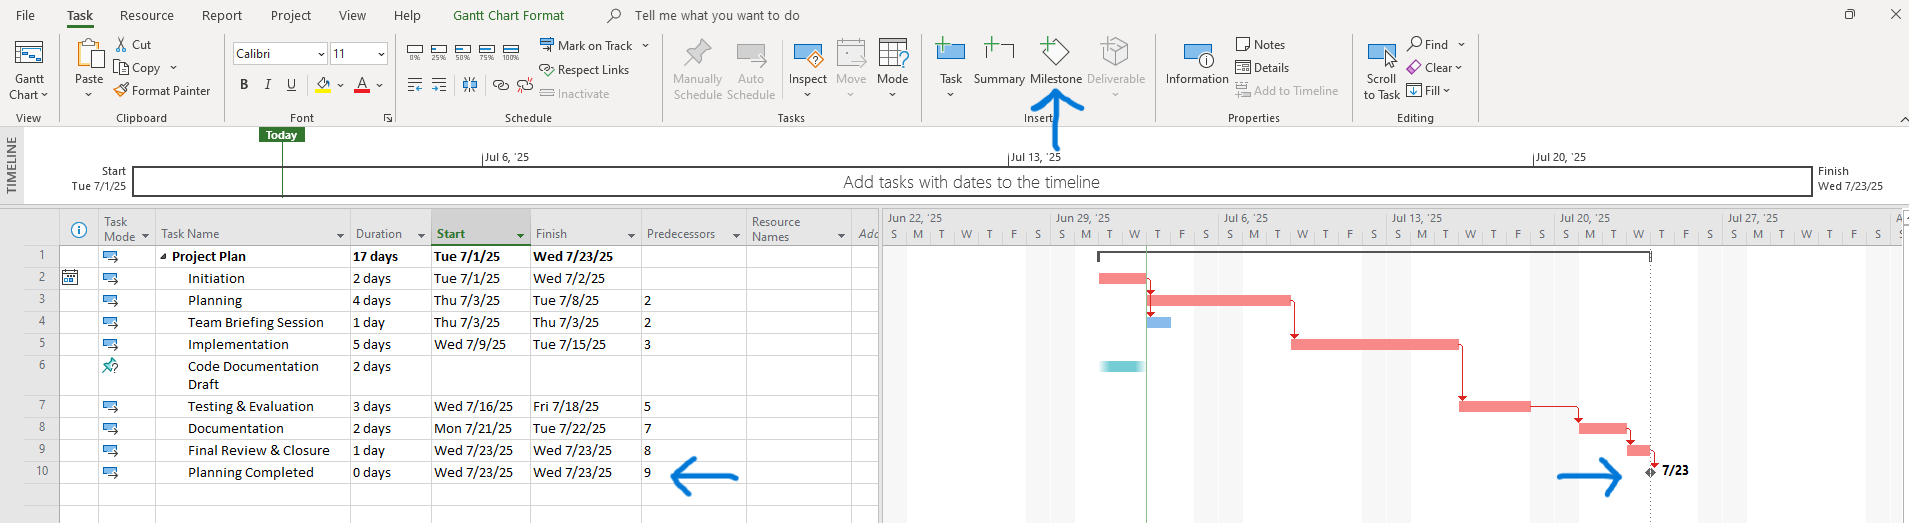
Step 6: Visualize the Gantt Chart
The Gantt chart gives a timeline view of all tasks, durations, dependencies, and milestones.
Use the Zoom In/Out slider to adjust view range.
Enhance visuals by:
- Coloring critical tasks
- Formatting gridlines
- Adding task notes
To highlight the critical path:
- Go to Format → Check “Critical Tasks”
Critical tasks will turn red.
Screenshot Tip:
Show a well-formatted Gantt chart with critical path: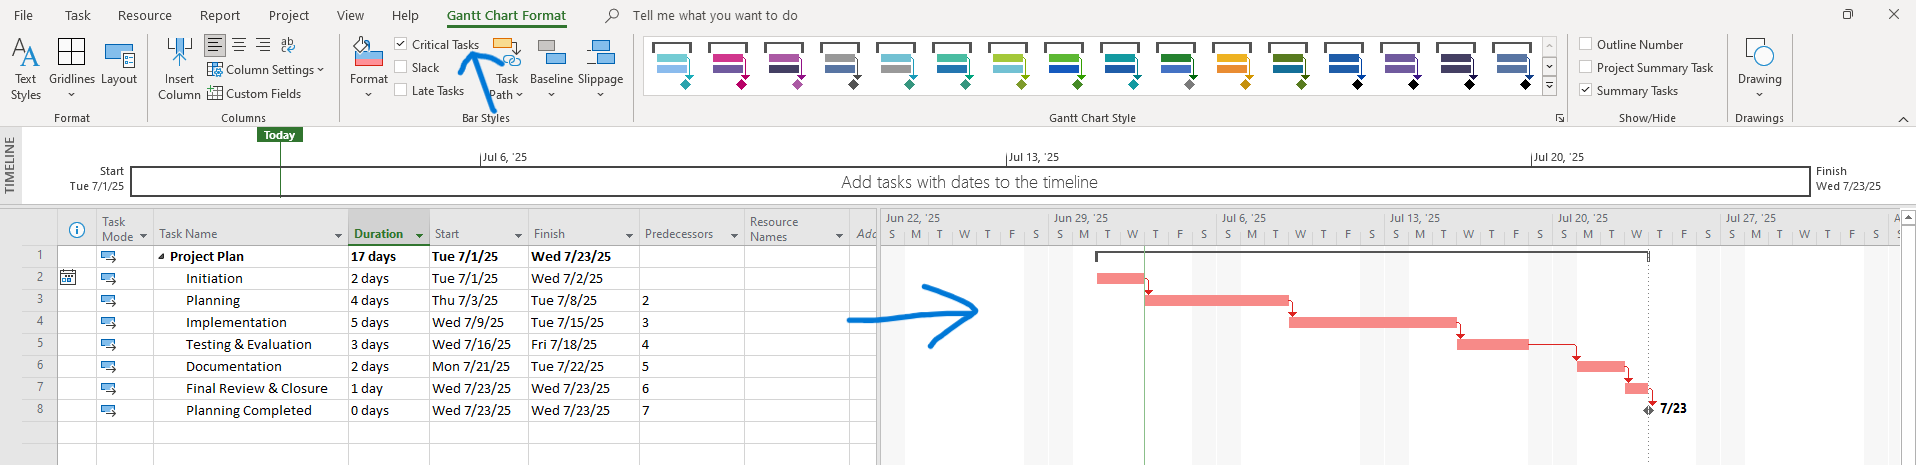
Step 7: Identify the Critical Path
The Critical Path is the sequence of tasks that determines the project’s minimum completion time. Any delay in this path delays the whole project.
To view it:
- Enable “Critical Tasks” in the Gantt Format tab
- Use the Network Diagram for logical flow
- Go to View → More Views → Detail Gantt for slack (float) visibility
Screenshot Tip:
Highlight critical and non-critical tasks in color: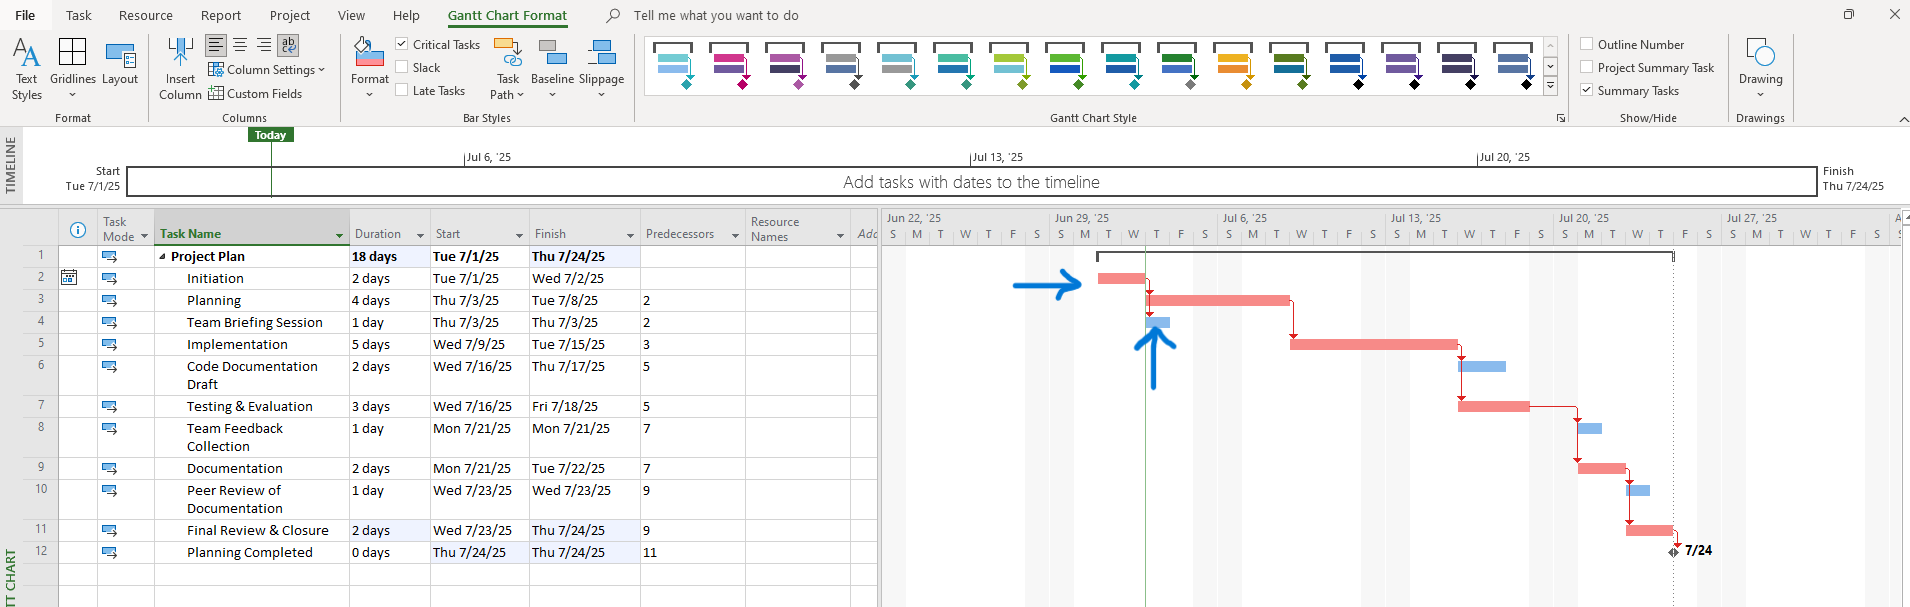 (Red lines are critical tasks and Blue lines are non-critical task/flooting tasks)
Step 8: Use Constraints and Deadlines
Constraints allow you to lock specific dates:
- “Must Start On”
- “Finish No Later Than”
Add via Task Information → Advanced Tab
Use Deadlines to trigger alerts without constraining the schedule.
Screenshot Tip:
Show constraint settings: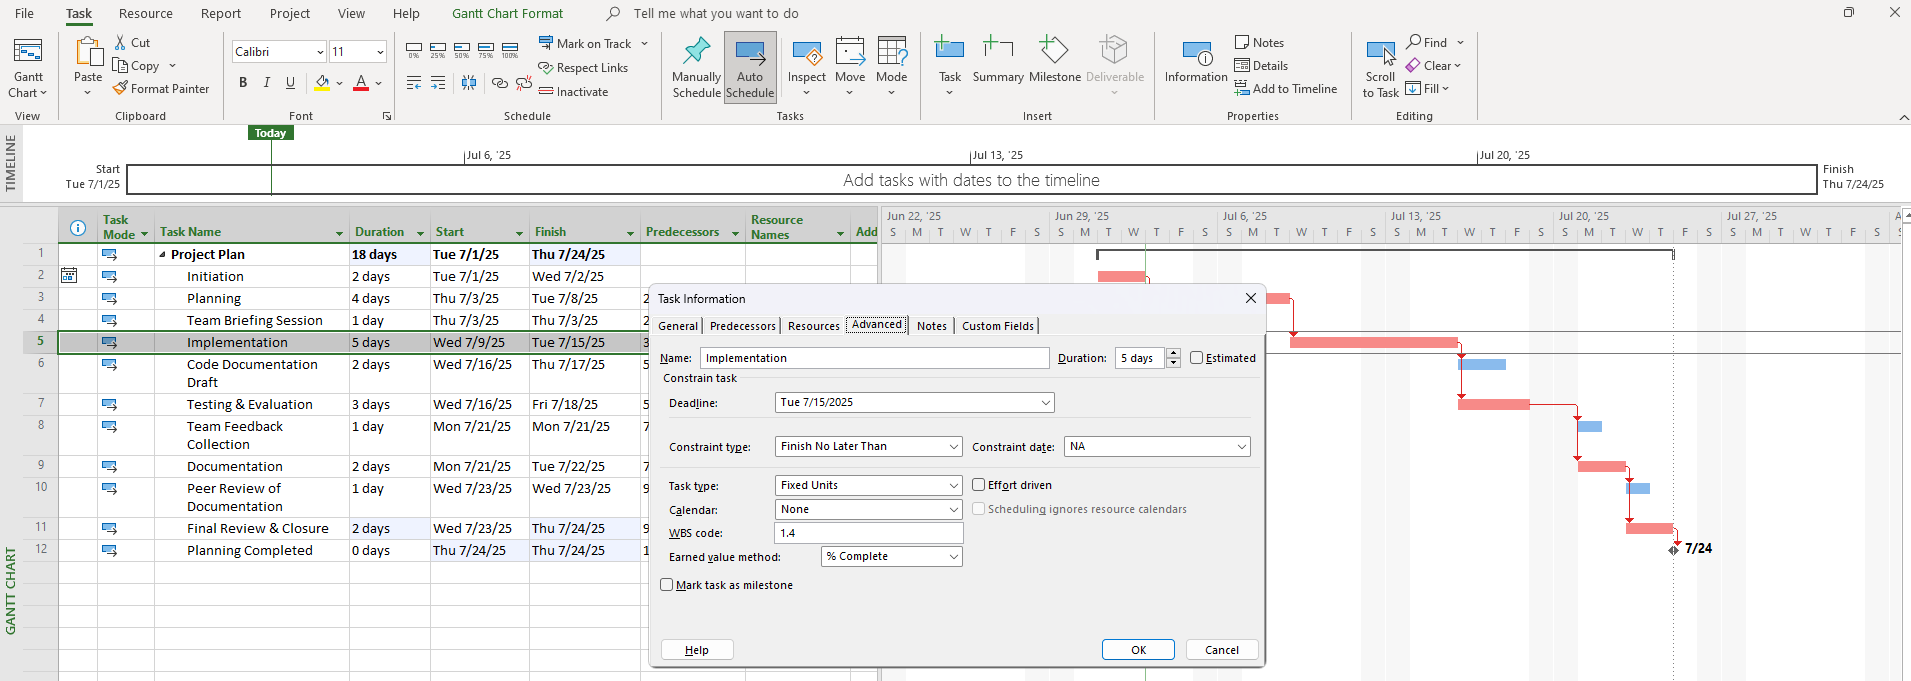
Step 9: Track and Monitor Progress
Once execution begins:
- Use the % Complete column
- Update actual start/finish dates
- Track slippage or task delays
You can also:
- Save a Baseline to compare planned vs actual timelines
- Use Tracking Gantt View to see delays visually
Screenshot Tip:
Show the Tracking Gantt view with variance: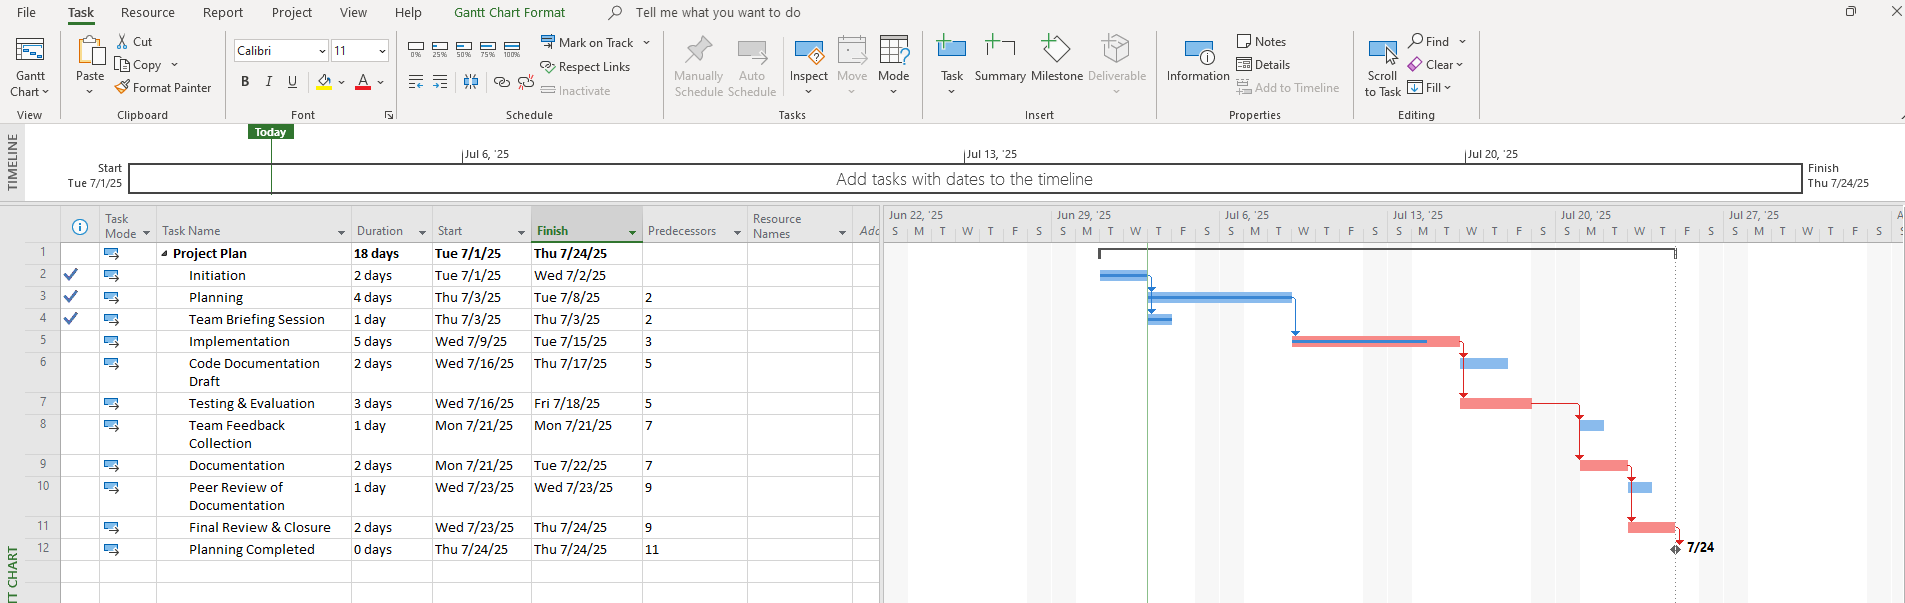
Best Practices
- Always define a clear WBS (Work Breakdown Structure)
- Link dependencies logically—not all tasks are sequential
- Avoid overuse of constraints; let MS Project handle flexibility
- Set realistic durations and buffers
- Review the critical path weekly
Use Cases in Academia & Industry
| Context | Application |
|---|---|
| Student Projects | Final year projects, thesis planning |
| IT/Software | Agile sprints, product release cycle |
| Engineering | Infrastructure deployment |
| Event Management | Conference planning, workshops |
| Research Grants | Grant deliverables and milestones |
Conclusion
Microsoft Project is a powerful project planning tool when used with intention. It transforms complex, multi-step efforts into clear timelines and visual progress maps. For both students and professionals, mastering MS Project brings structure, clarity, and accountability to your work.
“Good project management isn’t about rigid control—it’s about clarity, foresight, and adaptability.”